
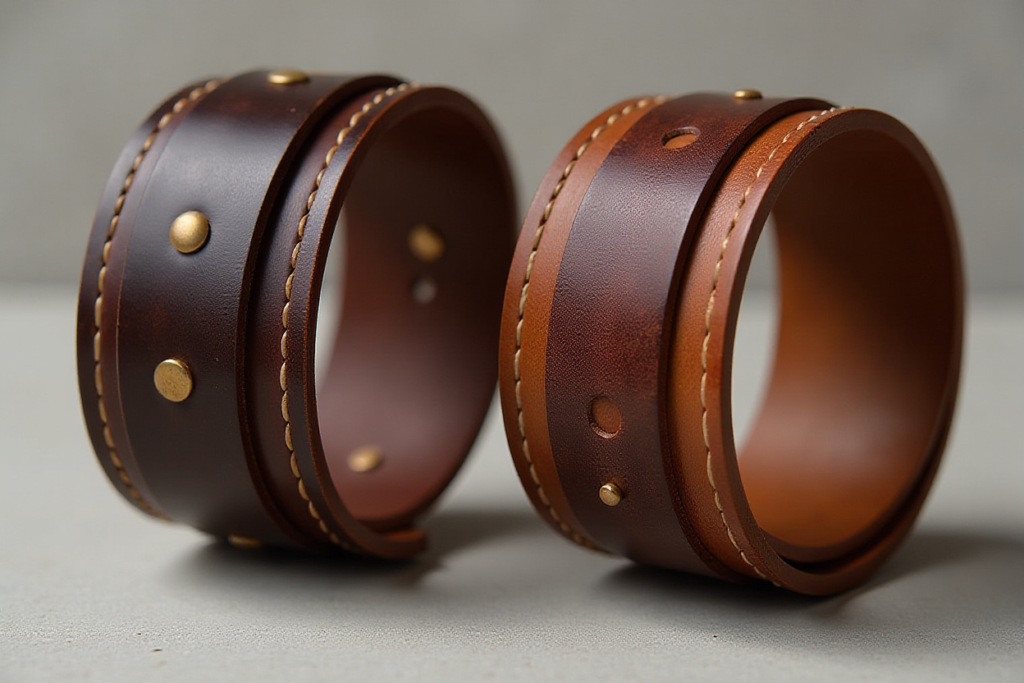
Did you ever ask yourself how to casually embrace the handmade touch? The process of creating a custom leather cuff bracelet is one of the most rewarding DIY projects around and is much easier than you would think! If you want to liven up some accessories or want to make a gift, or if you’re just wanting to try your hand at a freelance leather project, then making your leather cuff bracelet is the ideal place to begin. This guide will guide you through every step of the way, step by step, and with clear instructions. By the end of this project, you will have a one-of-a-kind, stylish cuff that represents your style. So, let’s explore the realm of DIY leather crafting and see how easy it is to create a little piece on your own.
Step 1: Gather Your Materials
Before you begin to craft your leather cuff bracelet you’ll need just a few basic materials and most are inexpensive and easy to find. Here’s what you’ll need:
Leather strip: Pick a strip, big enough to wrap around your wrist and approximately 1 – 2 inches in width. Softer leather is easier for beginners to work with.
Snap fasteners or clasp: You’ll then be able to secure the bracelet around your wrist.
Cutting tool: A heavy-duty pair of scissors or using a sharp utility knife will be helpful.
Ruler and pen: The absolute must-have for measuring and marking your leather.
Leather punch: It creates holes for the fasteners, and decorative designs, if any.
Leather dye or paint (optional): If you want to add color or a personalized finish, this is the option to use.
These materials are mostly available at your local craft store or online. Finding the right leather is important, if you’re new to leather crafting stick with medium-weight leather which is easy to cut but durable enough for your project.
Step 2: Measure and Cut Your Leather
All that’s left for a craft ready to rock is measuring and cutting your leather cuff bracelet. First, try around your wrist to find exactly what fits and is comfortable. Make sure you have the kind of fit that’s snug and comfortable but leaves just enough room for closure.
Use a ruler to mark the length of your leather strip, and make a careful cut. If you want to get more creative you can cut a slight curve or design into the edges. A straight edge will give it a polished look. Slowly cut, but exactly, to ensure no edges are uneven.
Step 3: Smooth the Edges
Leather raw edges are rough and can occasionally feel a little sharp so, take a few minutes to smooth them out. Round and smooth the edges of your leather cuff bracelet with a piece of sandpaper, or a leather burnishing tool. It’s this step, in addition to making the bracelet more comfortable to wear, that makes it look more finished and professional.
Step 4: Punch Holes for Fasteners
Then, make marks where you want your snap fasteners to go. Most of the time, you will have two holes at each end of the bracelet. These holes hold the snaps that allow you to put it on and take it off easily.
If you’re using an alternative closure like a clasp, remember to adjust the placement and the number of holes used.
Step 5: Add Color or Design (Optional)
This is the best time when you just want to add some fun to your leather cuff bracelet with a pop of color or interesting design. There are ranges of leather dye and paint, allowing you to make a custom look that suits what you prefer. For a simple look dye the bracelet as a single color. If you’re looking for something a little more intricate, add patterns — stripes or geometric shapes As long as the dye is completely dry you can move on to the rest of the steps without transferring any smudging onto the piece.
You can also add more designs that are personalized such as initials and symbols on the bracelet. If you are an artist, use a stencil or paint by hand these details!
Step 6: Attach the Fasteners
It’s now time to attach the snap fasteners to your leather cuff bracelet. Then place one part of it in each hole and use a snap setting tool to set them. To make sure each snap is secure, you have to be sure to press firmly.
This step will vary if you’re using a clasp or a similar closure style. You’ll follow the instructions for your particular closure type to be sure it’s correctly attached.
Step 7: Finish and Polish
Finally, polish your leather cuff bracelet quickly with some soft cloth. This will smooth the rough parts and give the leather a slight shine. If you want, you can even put a leather conditioner in to ensure your bracelet stays soft and does not wear away quickly.
Tips for Making Your Leather Cuff Bracelet Unique
Try Different Leather Textures: Try the look and feel of suede or embossed leather as an alternative.
Add Studs or Rivets: If you want an edgy look go for small metal accents like studs or rivets to your leather cuff bracelet.
Incorporate Beads or Charms: Attach thread of small beads or charms on the leather for an even more unique style.
Mix and Match Colors: It would be preferred multiple leather tones or braid strips of leather, for a multi-tonal effect.
Caring for Your Leather Cuff Bracelet
Avoid exposing your leather cuff bracelet to water as this will cause the leather to dry out or even warp. If it gets wet, let it air dry naturally and then apply a leather conditioner to restore its flexibility.
Final Thoughts
Making a leather cuff bracelet is not only fun to do but also is quite rewarding. Every bracelet you make is unique, which is a reflection of your style and creativity. Once the basics are mastered, you’ve got endless ways to customize and play and experiment with new designs, colors and textures. Get some leather, get your tools and start crafting! You will soon wear a piece of handmade fashion that’s uniquely your own.


Great content! Super high-quality! Keep it up!